
5.1 Sample operations
First sample preparation
In the following video I show you how a simple sample preparation is set up and started.
Assign Project / Workflow
If a sample is set up, a project and a workflow must be defined. If the sample weight is not determined during the workflow, it can be entered manually.
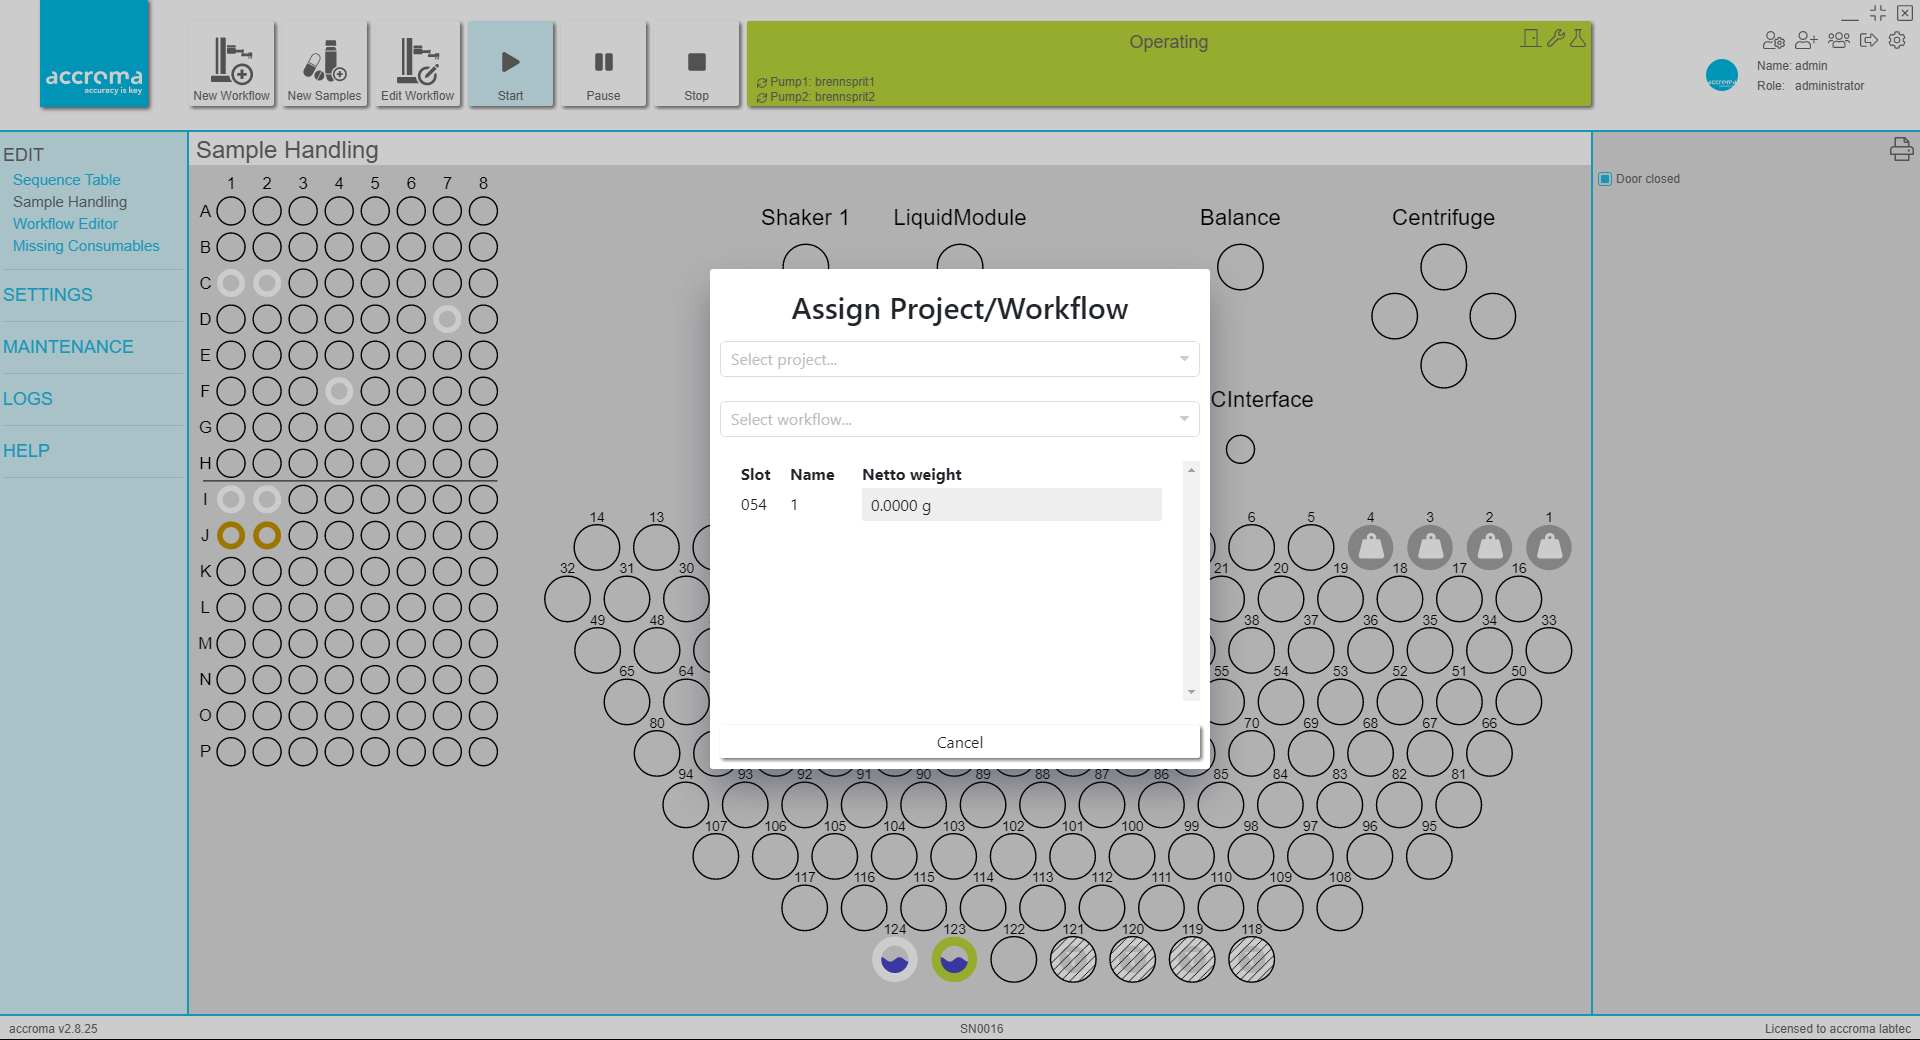
Select project…
Here an existing project can be selected or a new one can be created. To create a new project, a name can be entered and confirmed with the Enter key or a click on the entry Create “Project X” .
Select workflow…
Selection from existing workflows and their versions.
List of samples
Finally, all samples, their position on the rack and names are listed. Here you can also enter a sample weight for each sample under Net weight.
Missing information for sample preparation
If you determine during the setup of one or more samples that you have not yet created a workflow, the setup of the sample(s) can be aborted. An exclamation mark is then added to the sample to indicate that information is still missing for this sample.
Set up several samples
Several samples do not have to be set up individually, but can also be created at once. The automatic numbering can be used for this purpose. The following video shows how this works.
Start, Pause and Stop
To start, pause or stop a sample preparation you need the three basic operations. You can find out what a press on the respective button triggers in the video and the further explanations below the video.
blank
This blank is needed so that all toggles are closed first.
Pause
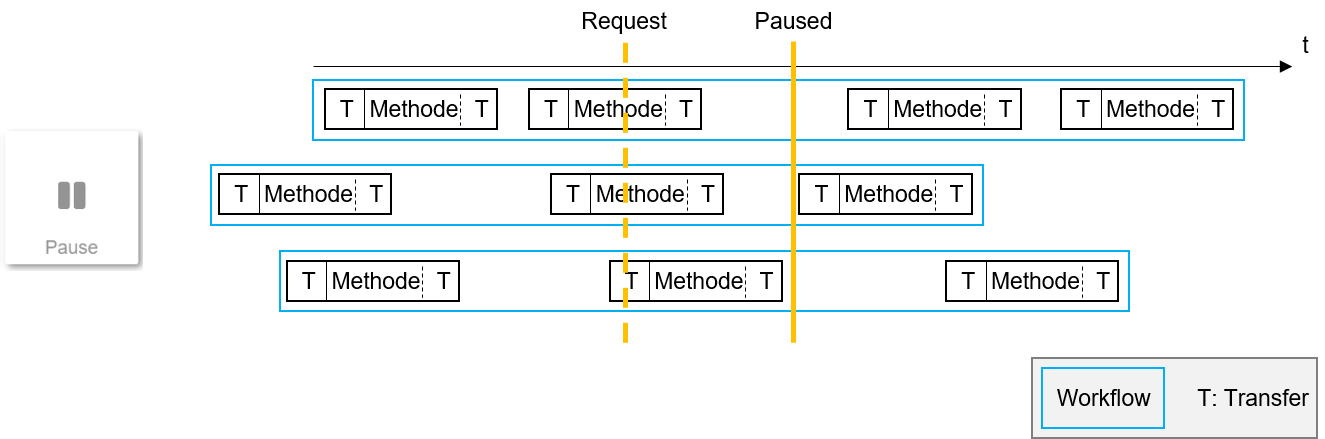
In the following graphic, the function of the Pause button is explained in more detail and thus the clear difference between Pause and Stop is shown.
The diagram shows three workflows (outlined in blue) consisting of individual methods and the respective transfers between them.
The dashed yellow line represents the point in time when the Pause button is pressed. You can see that the system is in the middle of the workflow when three methods are processed. The system then looks for the next possible time to terminate the active workflows. To do this, methods that have been started must be terminated until the point in time when the pause is active, marked here with a solid yellow line.
Stop
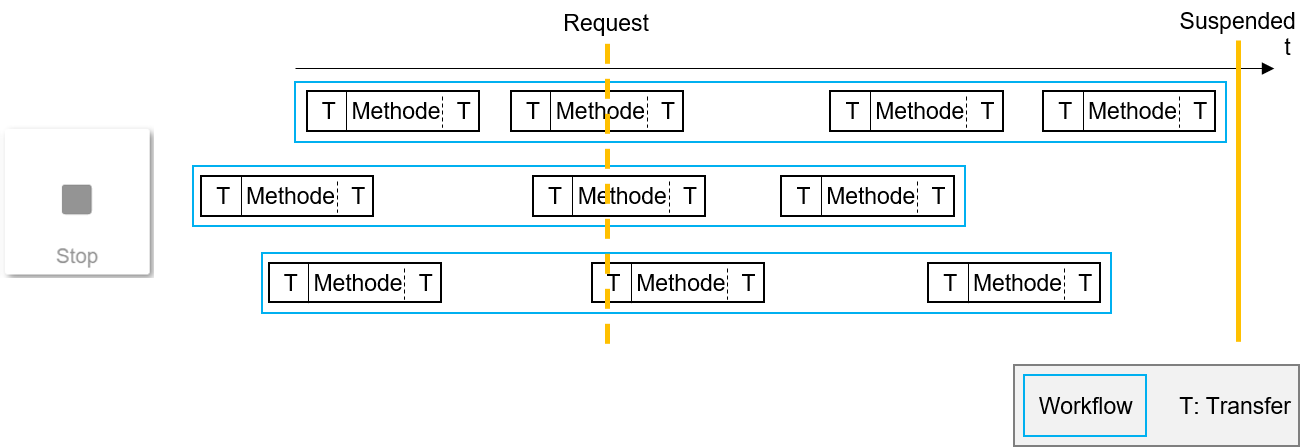
The following graphic shows three workflows (framed in blue) consisting of individual methods and the respective transfers in between.
The dotted yellow line shows the time at which the Stop button was pressed. If the button was pressed, all active workflows are first terminated before the stop is then active. The solid yellow line marks the point in time at which all active workflows were completed and the stop becomes active. No further sample preparations are started.
Operations in the Sequence Table
The basic functions Start, Pause and Stop always refer to all samples that were set up on the system. In addition to these commands, it is possible to pause, continue, abort and delete individual samples.
The following figure shows the Sequence Table with the different possibilities, which will be explained in detail afterwards.
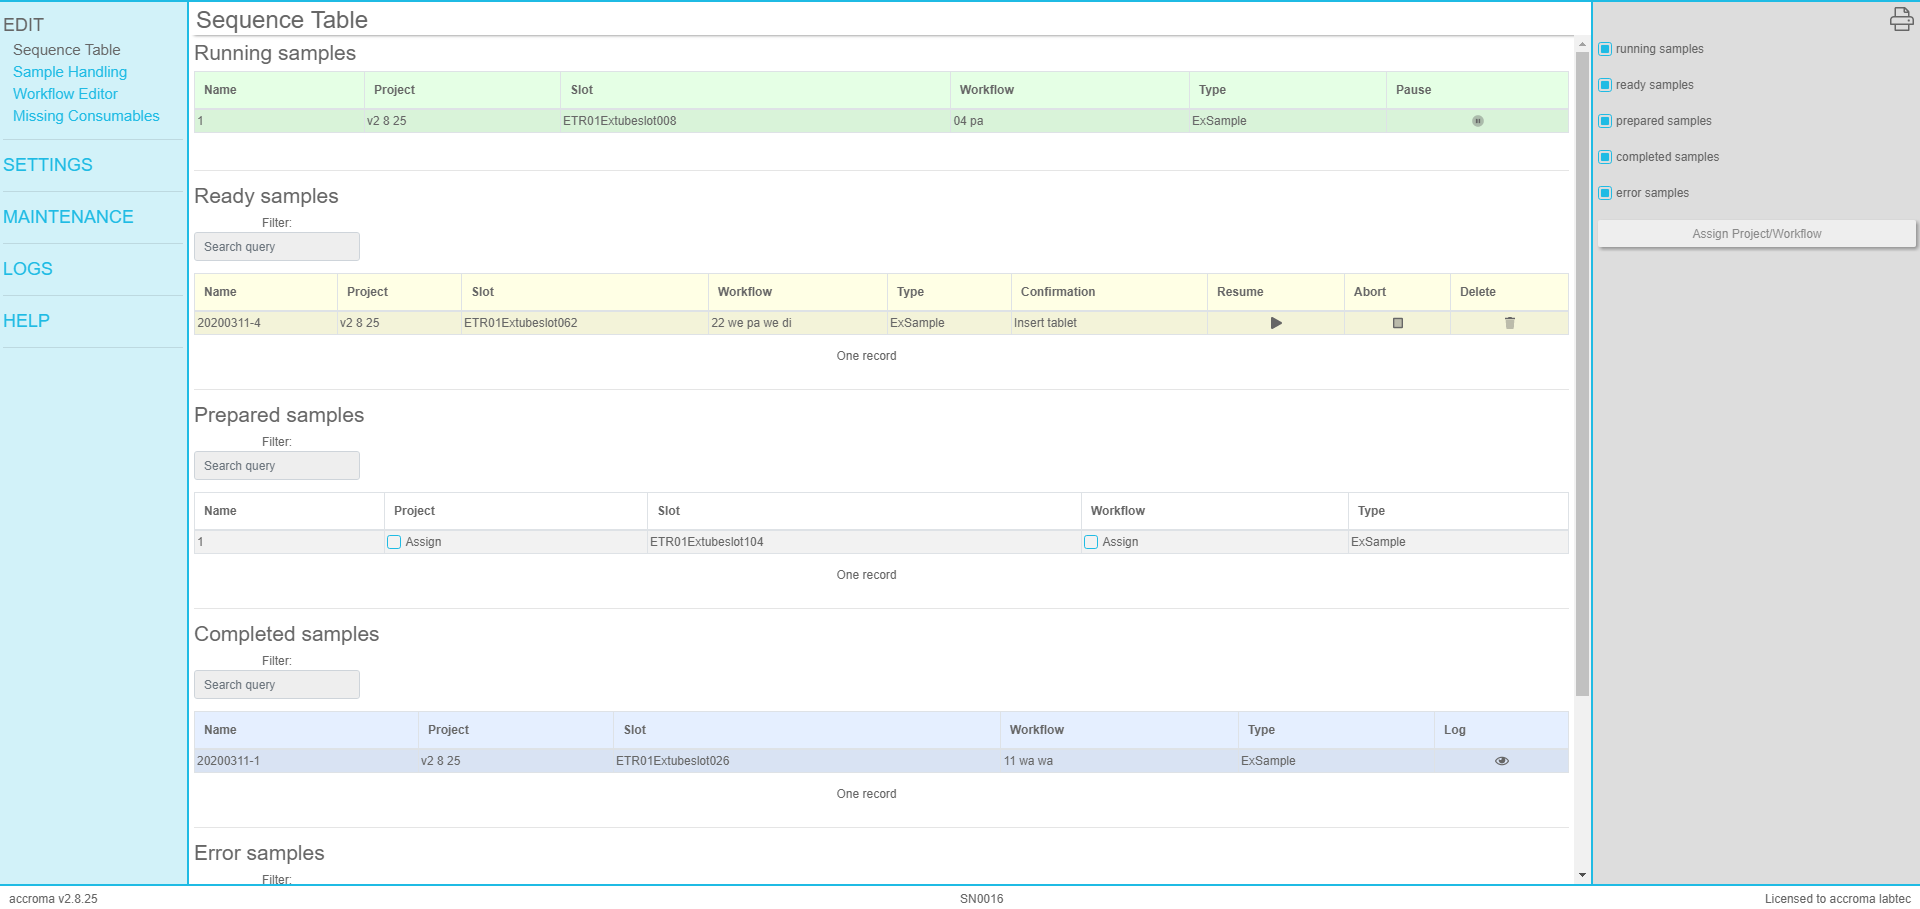
Running samples
In the list Running samples individual samples can be paused, which then move to the list Ready samples. Please note that depending on the progress of the sample preparation a pause is not possible or certain steps still have to be processed.
Ready samples
In the list Ready samples the commands Resume, Abort and Delete are possible for individual samples.
With Resume sample preparations that were paused or waiting for user confirmation can be continued.
With Abort the sample preparation is aborted and marked with a red cross.
With Delete a sample can be deleted. The sample is not deleted from the rack but moved to the list Prepared samples and marked with an exclamation mark on the rack.
Solvent tube
The Liquid Module can provide a maximum of two different solvents, therefore it is possible to provide smaller amounts of solvents in an accrotube on the rack.
The filling level is not monitored

A maximum volume of 120ml can be provided in the accrotube. It must be noted that the level in the solvent tube is not monitored. The user must therefore ensure that there is always sufficient solvent in the Solvent tube.
Filter on Rack
To be able to use other filter types than the type that is on the filter dispenser, you can use a filter slot adapter to provide additional types.
Sample preparation with several consumables
With the accroma, there are practically no limits to the user when creating workflows. Several consumables may of course be required for one sample preparation. In the following video I show you an example of how this can look like.
Hover over sample
To get more detailed information about a sample in the sample handling, you can move the cursor over a sample and an info window with the most important information will appear. The corresponding accrotubes are also highlighted.
Vial index
The vial index is one of the information displayed when hovering over a sample. It indicates the order of the consumables used. In the video you can see how it is displayed in the software accrolab.
Sample state
During and also before sample preparation there are different status of the individual samples and also consumables. The following tab lists the different states and their meaning.
Sample state
 |
Sample is ready for sample preparation or is already being processed |
 |
Sample preparation successfully completed |
 |
Sample with error, the sample preparation was aborted |
 |
The sample is missing a project and a workflow or only a workflow |
 |
Sample pauses and waits for user confirmation |
 |
Sample with missing consumable |
 |
Reserved Consumable |