
3.4 Liquid handling
Liquid handling basics
Liquid handling is an important part of sample preparation, which we will now take a closer look at.
In the following video the concept of liquid handling is explained. It shows how dispensing and pipetting of liquids works without contaminating the solvent and avoiding damage to the pump.
Washing the needle
After each use of the is washed. The following animation shows how this works:
Prepare solvent
In order to achieve the best possible accuracy, there are a few points to consider when preparing the solvent or solvent mixture. You can see what this is in the next video.
Which pump/ needle to use?
The accroma has two different pumps:
- Pump 1 with 18ml/min for needle 1
- Pump 2 with 72ml/min for needle 2
For both pumps we specify an accuracy of ±0.5%. So why is not only the faster version installed?
Pump 1 produces more accurate results, especially when using solvent mixtures.
In principle we recommend the use of pure solvents, as we have had the best experience with them. Further advantages are the flexibility and the documentation of the exact mixing ratio in the Sample Log. Depending on the method/ procedure, the volume contraction has to be considered.
If the use of a solvent mixture cannot be avoided, we recommend the use of pump 1 for more precise dosages.
No general statement can be made about the choice of the pump. The speed and required accuracy should be taken into account for the decision. The optimum variant is best determined in preliminary tests.
Connecting the solvent
Solvent Management Overview
Add solvent
Edit solvent
Pump Settings
To change a solvent for a pump or to flush the system, you must go to Pump Settings (SETTINGS > Pump Settings).
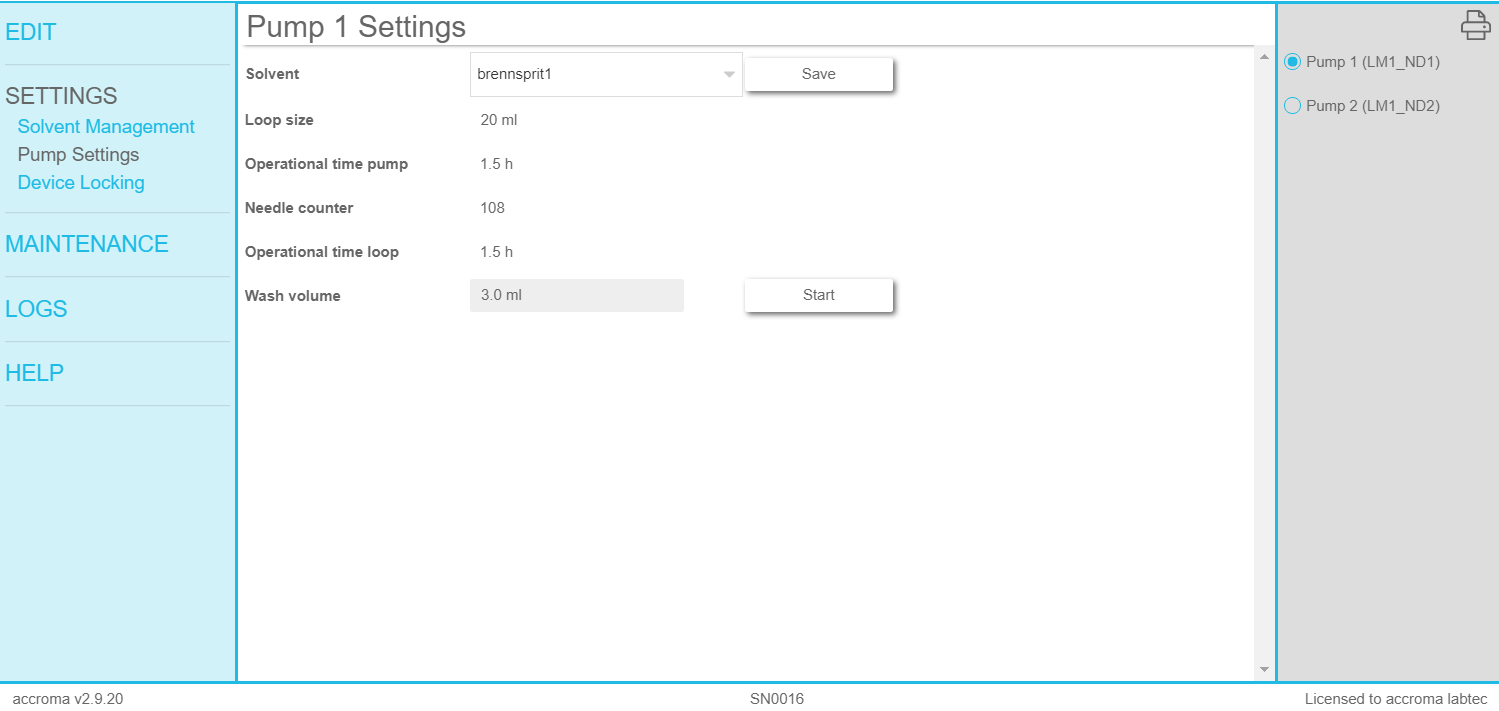
In the picture the pump settings are shown. In the main window all information about a pump can be found and settings can be made. In the sub-menu on the right hand side you can select the pump for which settings have to be made.
As a user of the Operator and Creator level, the setting options are limited to changing the solvent and rinsing the pump.
To change a solvent, the corresponding pump on the right side must be selected. Afterwards, an existing solvent can be set and saved from the drop-down list. The newly defined solvent is now shown in the status display.
As we have seen in the section connect solvent, the loop of the respective pump must be flushed when changing the solvent or after a standstill of 12 hours. To flush the system, the corresponding pump must be selected in the submenu. Now enter the desired volume at Wash volume and start the purging by clicking on Start.
Pump Information
Below is an explanation of the information that can be seen in the pump settings.
| Solvent | Setting the solvent |
| Loop size | Loop volume in millilitres |
| Operational time pump | Pump operating time in hours |
| Needle counter | Number of punctures in a septum |
| Operational time loop | Loop operating time in hours |
| Wash volume | Volume for a manual pump flush |